What type of products can you sell on Hyperaze?
On Hyperaze, you can sell virtually any kind of digital product — from Notion templates, bots, apps, and AI tools to Chrome extensions, e-books, gaming codes, and more. Whether you're offering one-time purchases or tiered subscriptions, Hyperaze gives you the flexibility to price your products your way. Plus, we handle license key management for you — so only paying customers get access, no manual work needed.
What are the types of pricing plans can I create for my customers?
On Hyperaze, you can offer 3 types of pricing plans for your customers.
1. Free
2. Subscription
3. One-time Fee
In addition, you may also choose to offer free trials for your customers.
Step 1: Create a Hyperaze account
1. Go to
Sign up2. Follow the instructions and sign up for an account
Step 2: Connect your Stripe account
1. Go to
Account Settings page.
2. Under “Linked Accounts”, click on “Add Account” right next to Stripe.
3. Follow the instructions on Stripe’s hosted page to connect.

Step 3: Create a product
1. Navigate to the
Products page
2. Click on “Add Product”

3. Fill in information about the product and save it. Choose the category applicable to you.

Step 4: Create pricing plans for the product
1. Click on the product that you wish to create a pricing plan for on the
Products page
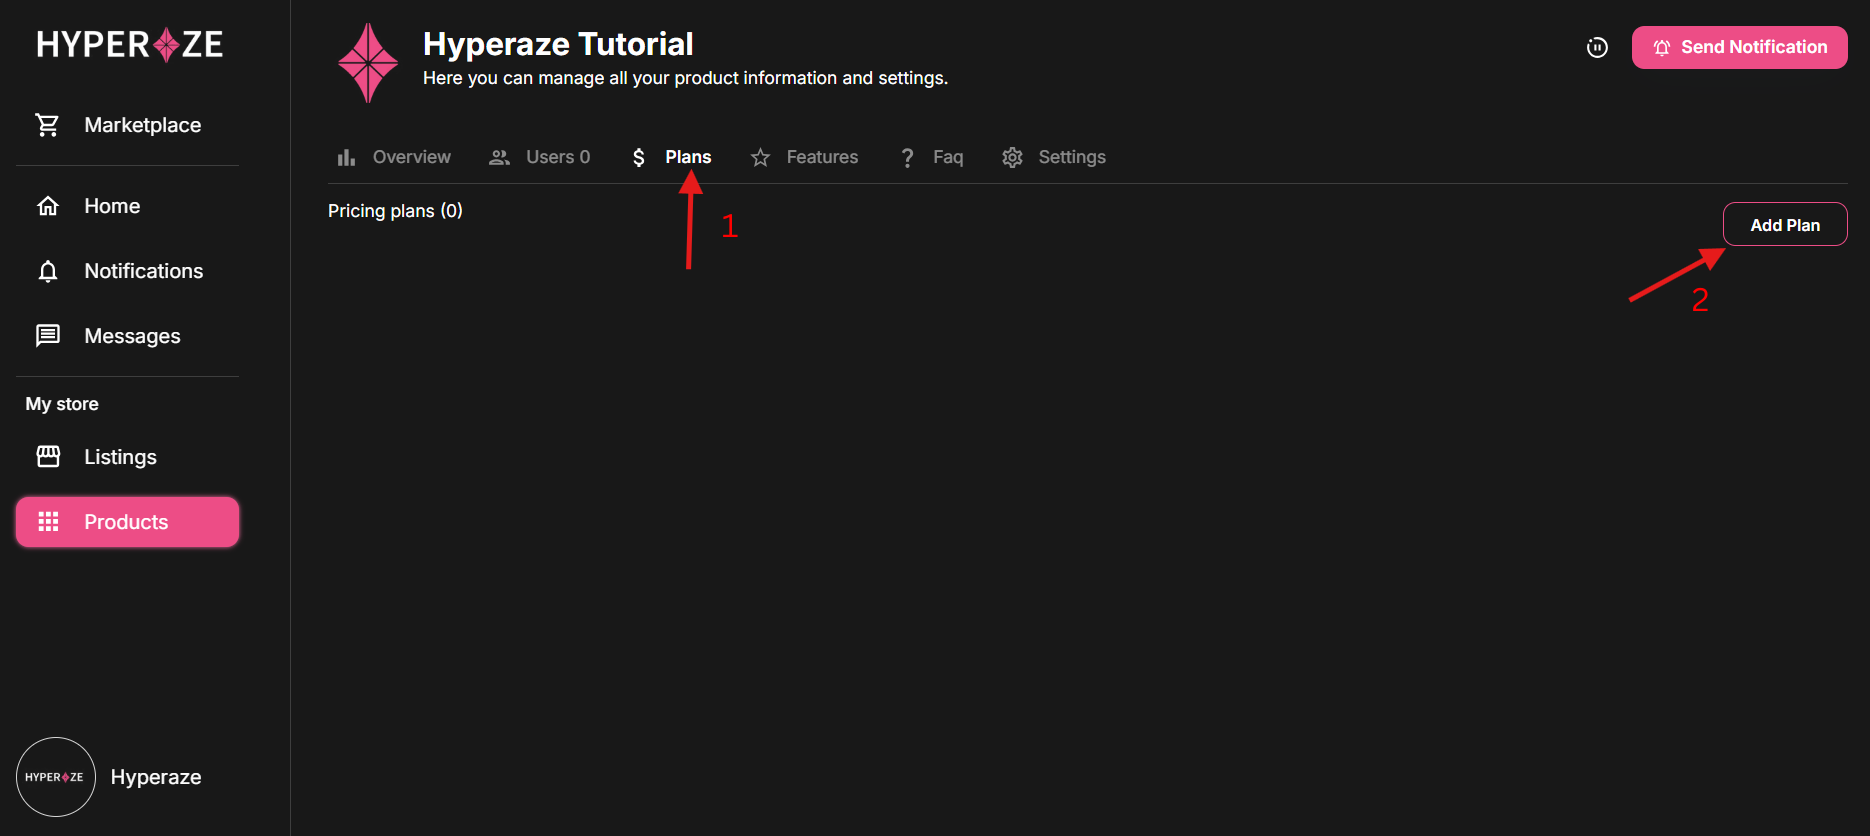
2. Click on the “Plans” tab then “Add Plan”
3. Fill in information about the pricing plan.
a. If a password is set, buyers will need to key in the password to access the product’s checkout page.
b. Stock number will limit the number of purchases of this pricing plan. When stock count goes to 0, buyers who wish to purchase the plan will not be able to do so.
c. Download Link provides a link for your customers to download your files.
d. If you are providing a discord server for your customers, you need to connect your discord account on the
Account Settings page. You may also wish to provide exclusive discord roles for your customers who have a membership. Customers will see an option to join the server.
** IMPORTANT. To allow customers to claim discord roles, you must invite
Hyperaze Bot to your discord server, and place the Bot at a position higher than the roles you wish to assign to your customers.
Refer to below on the guide to do this.
Step 5: Sell your product on marketplace/ using checkout links
1. There are 2 ways for you to sell your products.
a. Marketplace
b. Checkout Links
2. For Marketplace:
a. List your product on the marketplace for everyone to view your product.
b.
Go to Listings and click on “Add Listing”

c. Fill in the information about your listing. All information saved here will be seen by buyers. For Social, though it is optional, it is advisable for you to add to provide a means for customers to contact you for support.
d. Save your listing and you will be able to see it on the Marketplace.
Hooray! You have successfully listed your product 🤝
3. For Checkout Links:
a. Go to your product
b. On the Plans tab, click on more actions icon (3 vertical dots).

c. On the top right, click on “Create Link” and fill the information.

d. For a scheduled link, the checkout link will only turn active automatically when the current time is between the start and end date/time. Buyers cannot access the checkout page until the link turns active.
Inviting the Hyperaze Bot and assigning a role
Step 1: Invite Hyperaze Bot when you are creating a pricing plan for a product. Click on the button “Invite Hyperaze Bot”.

Step 2: Setting higher hierarchy for Hyperaze Bot
1. From your Discord server, go to Server Settings
2. Go to Roles and drag Hyperaze Bot to above all the roles that you want to automatically assign to your customers.

